
Tutorial: Setting up WPack.io for your WordPress.
WPack.io is a very neat webpack-based build chain to use for your WordPress development, it isn’t too popular yet and lacks documentation at this point (There is literally just the website itself and it is not overly verbose).
Your old gulp setup does it quite well, still, doesn’t it? Let me be frank: No it doesn’t. It is slow as as a sloth, is a pain to setup for Typescript and don’t get started on including separate react components…
If building WordPress is your bread and butter, you probably have your own way of doing things. I have seen many setups in my work, some were baffling in the dullness of their own crudeness, others worked with several templating engines and a whole array of obscure JavaScript libraries, where you would need a tutorial on the build chain alone.
But if you want to develop fast and efficient, you need to refactor, revise and never be afraid to tear down what you have once held dear. So this is my story too.
Recently I was very excited talking to a client about rebuilding their website after 4 years. We talked about using modern headless approaches like Frontity (not quite mature yet imho, but very very promising) but at the end decided to go with “plain WordPress”. Needless to say that the old build chain is a bit dated, running on npm 6.9.5 and at this point only surviving by copying node_modules from one incarnation to the other.
But having some budget and time at hand I decided to investigate.Enter: WPAck.io.
What is WPack.io?
Or maybe first: What is webpack (The technology behind WPack.io). Put simply webpack is a node.js server that takes care of the most typical tasks you need for development:
-
- Compiling and transpiling your JS and TS files into a minified JS to be enqueued in WordPress.
-
- Compiling your SASS/LESS/CSS files and making sure the resulting CSS is supported by as many browsers as
possible.
- Compiling your SASS/LESS/CSS files and making sure the resulting CSS is supported by as many browsers as
-
- Providing you with a development server that reloads the assets or the whole page once a file changes.
-
- And so much more, that is of less importance for this tutorial.
But webpack in my opinion never has been “easy to get into”. If you have worked with webpack before however, you know that it can take a while to set it up properly, giving rise to libraries like parcel, which I can highly recommend, or leading you to the path of least resistance and sticking to your old gulp build chain…
So Wpack.io basically makes this web pack setup process much much easier. Allowing for really cool features out of the box like:
-
- Using Typescript (and never look back…)
-
- Using React for parts of the page or the whole page
-
- Creating archives to easily export the themes and plugins anywhere
-
- Hot reloading (from memory, not files!)
We will dive into a few more features later on.
Basic setup for WPack.io
Let’s get started. To get everything up and running you will need the following ingredients:”
-
- Have a WP installation somewhere running on your local server (using MAMP for example).
- Create an empty theme, I call it “mytheme” in this example.
- I was using node 14.5, if you have an older version, you could want to upgrade and use n to switch if needed.
- For ease: have composer set up on your machine. (It is really just one line using a package manager like brew for Mac OS)
Setting up WPack.io is really easy.

Call npx @wpackio/cli in your theme folder. Once this is done the wpack.io tools are installed and you are ready to setup your project.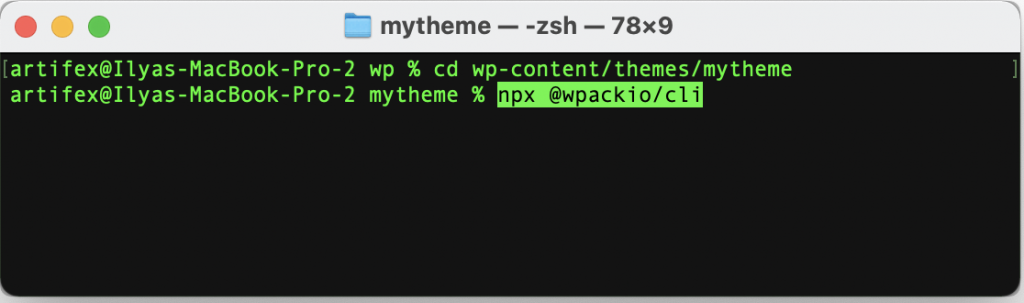
Run npm run bootstrap and follow the simple instructions.
There is only one thing to lookout for here, you have to type in the name of your theme correctly. Otherwise you will have to change that in the settings file later.
Setting up WPack.io configuration
There are just a few things I had to change in order to make it work to my liking.
Files Object in wpackio.project.js:
files: [
{
    name: 'app',
    entry: {
         main: './src/js/app.ts',
         admin: './src/js-admin/admin.ts',
         editor: './src/js-admin/block-editor-plugins.tsx'
    },
    webpackConfig: undefined
}
]
Each element in the entry object specifies a file that will be compiled. Each of them you can later embed in separate hooks in WordPress. My setup is usually that I have three main entry points:
-
- a main-script which embeds the JS and CSS files used for the whole site (some parts of it possibly dynamically loaded at runtime).
-
- an admin-script which is only embedded in the backend and used to do anything special I do in the backend (like functionality for settings pages and so on) as well as import styles to the backend.
-
- an editor-script which is used to hook into existing WordPress Blocks (or create new ones).
Obviously you don’t need your admin script in the frontend and your editor-script will not work, on a page where the block-editor is not present. Hence they are separated. You will probably have your own way of doing things at this point. WPack.io allows you to separate these into as many parts as you wish and this is the important point. Using the various WordPress hooks you can embed these later into the theme or even separate templates.
Watch Array in wpackio.project.js:
watch: ['./library/**/*.php', './**/*.latte', './functions.php'],
This array simply defines the files that are considered part of the frontend (besides JS and CSS) and when changed will trigger a reload of the page in the development server. I recently started using Latte as a templating engine, so I included *.Latte files here as well, all my php files for the theme reside in the library directory.
Proxy String in wpackio.server.js:
This String simply defines the local server your local development runs on. My domain I used for development is “http://noenew.dv”.
proxy: 'http://noenew.dv'
Testrun the Build Chain
You need to at least create an empty JS file for each of the entry points (I used typescript for my setup, more on this later) in order to start the server.
At this point you can safely run “npm start” and see if the server pops up correctly. It should run right out of the box.
The server will run on an address like 192.168.0.3:3000 but display your WordPress site (in my case on noenew.dv) correctly. This is a change from my previous build chain that would run directly on the server.
Note: In development mode (i.e. with npm start) you will not see any js files or anything generated in your output (dist/ by default) folder, since they reside in memory and are only created when you run “npm build”.
Note: You will get errors, if the src folder for your assets is not inside the theme-folder. (This is due to the fact that certain config files can’t be found, it is easiest to just keep them inside the theme folder for the sake of this tutorial).
Enqueuing scripts in Wordpress
Now that you have your compiled assets and realising they are not even there in the list folder, how do you embed them. WPack.io has a small PHP library to do that for you.
In your theme folder run “composer require wpackio/enqueue” to install this package. (Think of composer as an npm for PHP, if you are not familiar with it).
In your functions.php (for example) you need to import these scripts, like so:
//Require the composer autoload for getting conflict-free access to enqueue
require_once __DIR__ . '/vendor/autoload.php';

//Instantiate the Enque Class to load the compiled assets
global $enq;
$enq = new \WPackio\Enqueue('mytheme', 'dist', '1.0.0', 'theme', __FILE__);

//Scrips for the frontend
function enqueueScripts() {
    global $enq;
    $res = $enq->enqueue('app', 'main', ['jquery']);
    //get the handle to localize scripts if necessary (to pass data directly from WP to frontend)
    $entry_point = array_pop($res['js']);
    wp_localize_script($entry_point['handle'], 'MyGlobal', ['a' => 4711]);
}

//Scripts for the block editor
function blockScripts() {
    global $enq;
    $res = $enq->enqueue('app', 'editor', []);
}

//Scripts and Styles for the Backend
function adminScripts() {
    global $enq;
    $res = $enq->enqueue('app', 'admin', []);
}

add_action('wp_enqueue_scripts', 'enqueueScripts');
add_action('admin_enqueue_scripts', 'adminScripts');
add_action('enqueue_block_editor_assets', 'blockScripts');
The script is pretty self-explanatory. You use the names you put in the entry object in wpack.project.io as parameter to the enqueue function to pull the scripts you need.
This is it, at this point you should have your styles and scripts loaded in the backend, frontend and/or block editor.
Typescript
Adding of typescript works out of the box. Check the tutorial on the wpack.io website. The basic steps you need are just these two:
- Create a tsconfig.json as proposed in the tutorial.
- Install typescript and fork-ts-checker-webpack-plugin (npm i -D typescript fork-ts-checker-webpack-plugin)
If you have never worked with Typescript have a look at a million tutorials on the web, since TypeScript is in most cases optional, you can start “gently” by adding a type here and there to enjoy the benefits of pre-runtime errors and work your way up to more complicated features like generics and such.
I was really surprised by how neatly everything works, once it is setup.
-
- You get hot reloading even when working on the backend of WordPress or the block editor.
-
- As promised, compilation is really fast and snappy.
-
- Once you npm run build your project the generated files will have unique names every time, so no need to take care of any versions and caches when uploading to the client.
In overall I am really happy with this new build chain and eager to explore how it will fit with the base theme that I developed over the years. So go ahead and give WPack.io a try!
Ilya Shabanov
Glad you found your way here! Learn about my work or comment if you have questions.
- What is WPack.io?
- Basic setup for WPack.io
- Setting up WPack.io configuration
- Testrun the Build Chain
- Enqueuing scripts in Wordpress
- Typescript